Monday 27 October 2014

First Birthday Giveaways, A vintage Sewing Basket

Well I am very excited! Next week marks Miss Molly's Dolls 1st birthday. And what a year!

It all started with knitting little dolly clothes to keep my hands and mind busy while I was at home raising my large brood of children,  the youngest 3 all being born within 16 months of each other. Now I can admit I had fallen deeply into postnatal depression and I was searching for anything to help me climb out of it. So one day  I began with some knitting while the children were playing in the garden, I hadn't knitted anything for years and it was a lovely way to keep my mind busy. And oh what a lesson in concentration, keeping count while I conversed with my littlies. Or keeping calm when our very young puppy ran away with my ball of wool and my knitting still attached and dragging behind. There was no doubt knitting became my therapy! On days when I felt I couldn't cope, I just thought about the stitches... one stitch after the other, just like life... one step after another.

Keeping track of patterns was of no use under the chaos of our home, and I soon gave up. Instead I began making my own patterns up. Then I decided to teach myself how to crochet... ahh the hours of me in front of YouTube videos, a crochet hook in one hand some yarn in the other. And just when I thought I stood no chance of ever mastering it, like a scene out of My Fair Lady I heard Rex Harrison's voice exclaim... "By George I think she's got it!!!!"

 
And so began the thought of Miss Molly's, perhaps I could make some things to sell, to pay for my yarn. But also to justify the hours of time spent with hands busy away making things. And then the distant thought.... perhaps I could go back to doll making.

I found it impossible to even dream of sewing or doll making during the day, with two toddler boys and a sewing machine on the table.... enough said!! So I became a night owl, as the children went to bed so began the doll maker's journey. So many dollies ended up in my girl's toy boxes in the process of trying to master Waldorf doll making. When I made Waldorf dolls for my children, it didn't matter if there was a lumpy arm, or a stretched seam.... because it was for my child to play with and made with complete love. But to sell a doll that was a completely different story, it had to perfect, or as close as I could get to perfect. Many times I felt like giving up, but a well known Waldorf doll maker said to me the secret of Waldorf doll making is... "practice, practice, practice!"

One year on I don't think by any means I have mastered it, I am still practicing... and I am still the night owl doll maker, getting out my machine once the children have gone to bed, still fearful of the boys playing with my tension knobs and climbing under the table and around my foot pedal while I sew! But I do feel I have achieved a lot this year for sure, and a lot of it due to the encouragement and unbelievable support from people all over the world. On days when I questioned my work and my abilities.... the cheering from my Facebook page kept me going, boosted my spirits and forced me to get back into the saddle. These people became my friends and in many ways helped me in my journey out of PND.


So it is almost 1 full year. And I feel birthday celebrations are more than needed. This year has meant so much to me. Being a stay at home Mum can definitely dampen your confidence, and I have been completely blessed by the support I have received. I have decided then more than 1 giveaway is necessary. So I have a few planned, representing some of my Miss Molly loves.

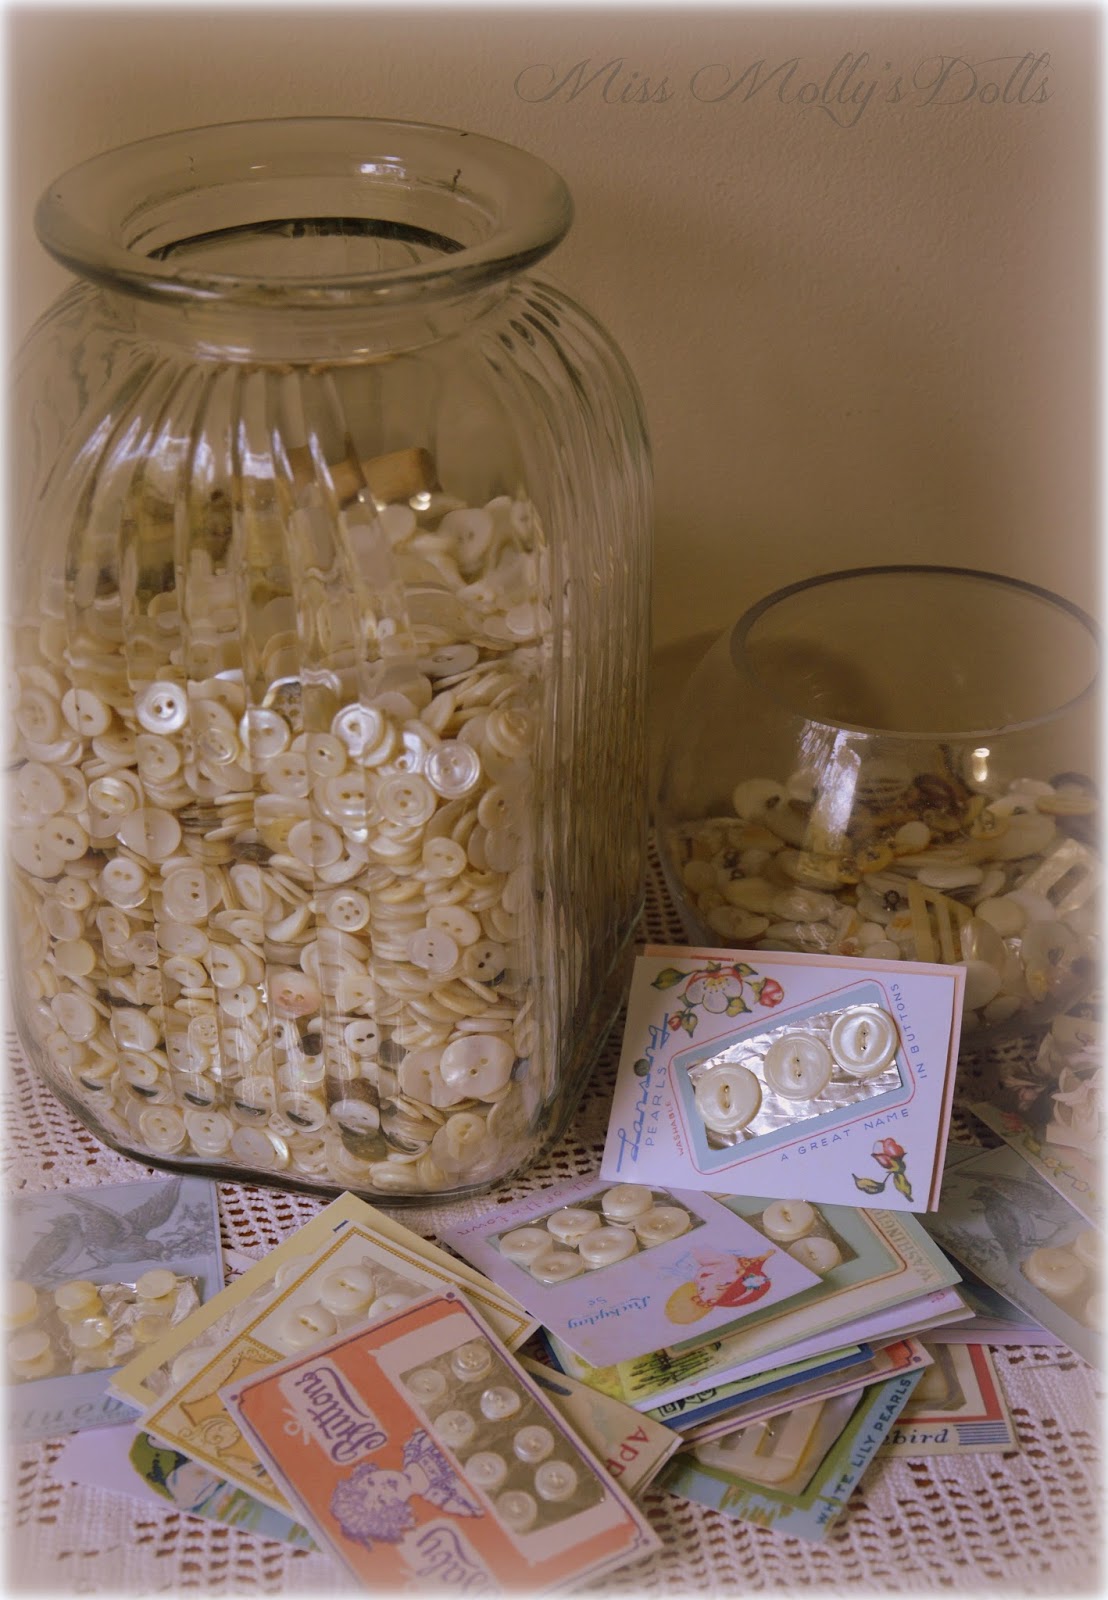
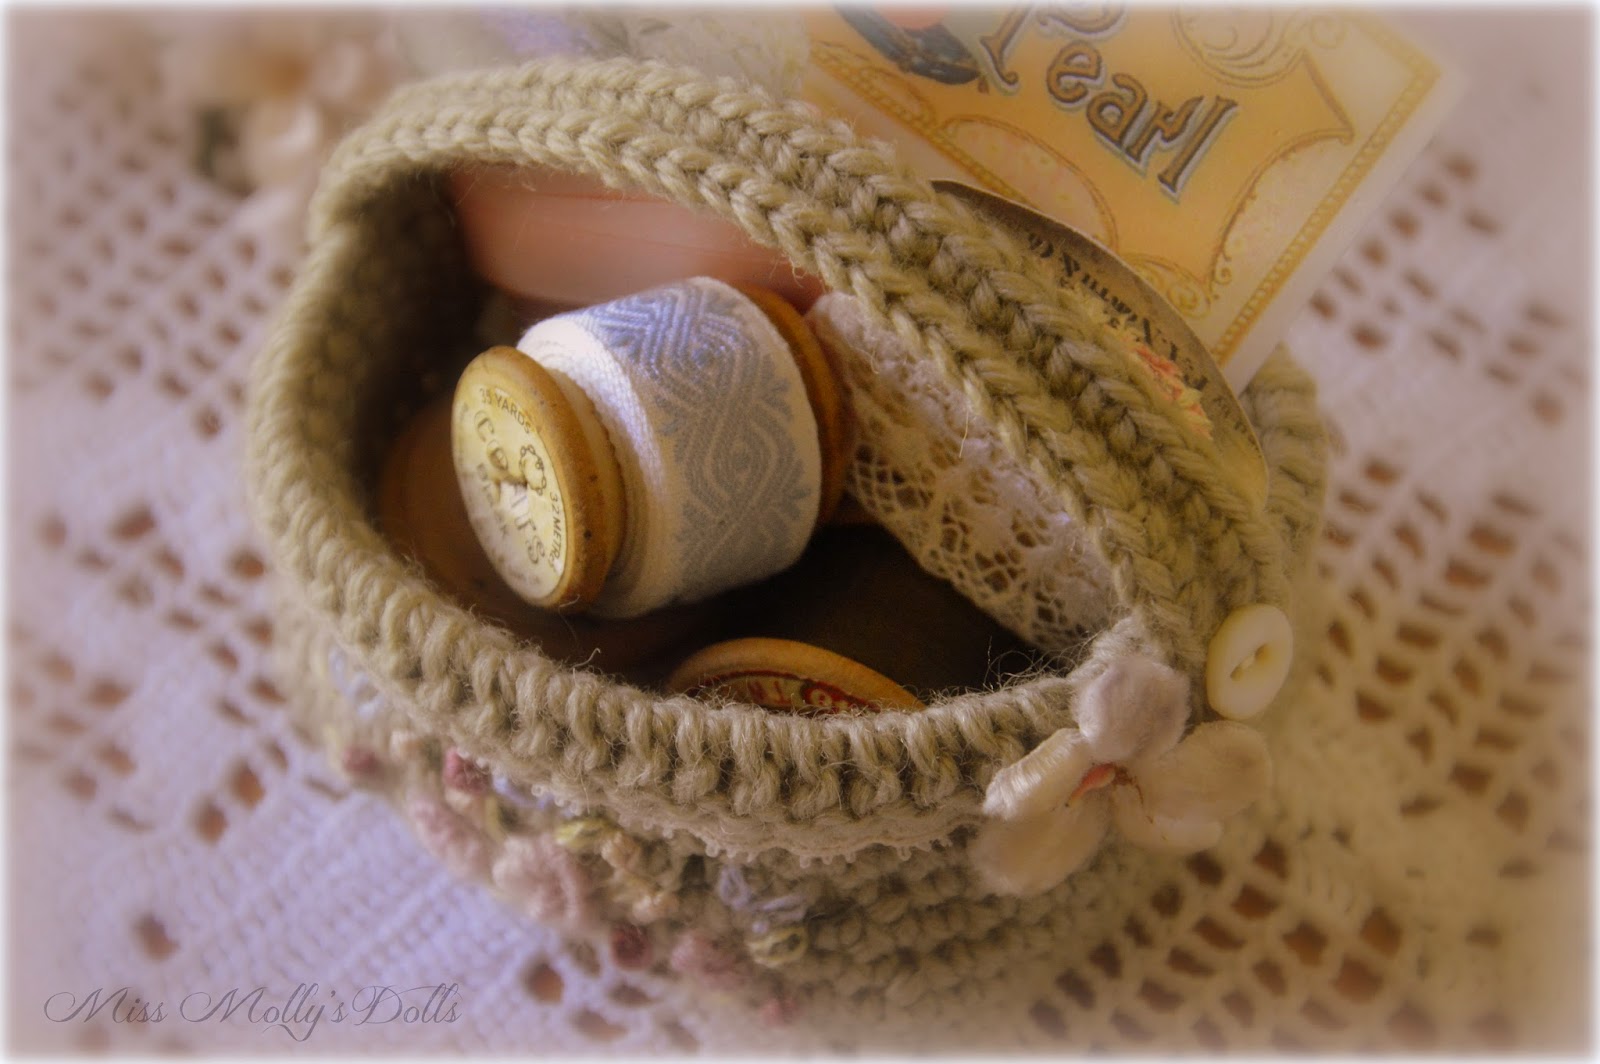
The first giveaway I can reveal is a little celebration of my love for vintage sewing supplies, a little sewing basket filled with my favourite things.

This little basket is finished with vintage lace, MOP's and a very special antique velvet flower from my collection. Its filled with MOP button cards, spools of lace, ribbon and trim and vintage cotton reels.

As the week goes on I will let you all know the other little giveaways. If you are interested in joining the giveaways keep an eye out next week on my Facebook page.


Mel xx

Saturday 25 October 2014

The History of MOP Buttons

One of my all time loves is the Mother of Pearl button. There's not a week that goes past here that the postman doesn't delivery me a little package with a few these beauties. I use them in almost everything I make, hats, dolly dresses and of course knits. But can I announce that I have an addiction to playing with my buttons.... some things never change because as a child I used to play with my mothers and grandmothers button collection. There's something about the feeling of your hand moving around a tin full of smooth buttons, sorting through them and discovering shapes and sizes.


So yes, I freely admit I have been caught on numerous times in an hypnotic state with my hand in my button jar... embarrassing I know and the fact that I am openly admitting to it on the internet only serves as proof of my addiction to these amazing, beautiful, dare I say, works of button art!


But it got me thinking.... as I stared fondly at my ever growing button jar, where did they come from and what is the history of the humble vintage MOP button?

I have known for some time there are two kinds of buttons in my collection, river buttons and ocean pearls. The river buttons have a creamier look to them where as the ocean pearls have a very distinctive iridescence. Both though have quite different histories.

River MOP Button
The majority river MOP's come from the USA. They used the mussels growing along the river edge. Button factories popped up along rivers in the United States from the 1890's to the 1940's. The Mississippi River being the largest producer of buttons.

The industry boomed over the first four decades of the 20th Century, like a gold rush people came to the rivers to harvest the mussels and make their fortune. Town after town adopted the button making industry, and hundreds of factories came into existence..

 
 At the height of harvesting and production the Mississippi saw 2600 barges working the river. In a single year just one  town  produced as many as 138,615,696 buttons!!

 
The sourcing and production of MOP river buttons slowly ceased towards the end of the 1940's, this stemmed of course from a change in fashion and the introduction of plastic buttons, but equally through the absolute decimation of mussel populations.
 
Pacific Abalone
A very large proportion of the worlds MOP buttons were also sourced from shells around the pacific, Abalone being the most popular. Australia during the height of the MOP button boom was a major exporter, as well as many other pacific countries. Unlike the collecting of river mussels though, shell fishing was a dangerous affair and many died in the process of collecting these beautiful shells.


Once the shells were collected, they were dried in sun.  


Australia exported the majority of their shells to factories around the world to be cut, polished and carved. Sad to say that I failed to find any reference to an Aussie button factory during this era, it seems we were a primary resource only. Even button factories situated close to the coast in the USA used shell from either Australia, Japan, New Zealand or the Philippines.

The Production of MOP's
Once the shell was collected the production of buttons fell into 3 stages, soaking, cutting of blanks and  polishing and carving.
 
 
The shell was soaked for at least a week to ensure they wouldn't shatter during the cutting process.

The next stage was to produce the shell blanks. This job was mainly left to men, and involved the cutting of discs into the raw shell using a special lathe. Although the production of button blanks existed in the button factories themselves, it was also a booming cottage industry and many people had button cutting machines in their homes.


This amazing video from the Milton Historical Society recounts memories from a town devoted to the production of MOP blanks.


The blanks were then shipped to factories all over the world that specialised in the polishing, and carving of buttons. England in particular had many, many factories devoted to this skilful art. But there were many around Europe and America. Some of the buttons produced during this time were absolute works of art. Many carved by hand.


The final stages of button production was often a women's affair as many women were employed in the finishing of MOP buttons as well as sewing the buttons onto button cards..


 I think for me researching the extraordinary history of MOP buttons has only heightened my adoration for them. Of course the sheer size of the production in the 50 years of the height of their popularity is mind blowing, but I think also the realisation that so much of their production was by hand and involved entire communities and townships. After the 1940's we saw machinery development and button production shifted into overdrive. These automated machines could produce the same amount of buttons one person would make in an entire week in just one hour.
 
Vintage MOP's are yet another example of a time where craftsmanship was valued and beauty was cherished... even with something as simple as a button!
 
Mel xx

Friday 24 October 2014

Roses in time

After a turbulent couple of weeks I finally feel like I am getting back to a little bit of Miss Molly work. My Mum was in an accident and I have been concentrating on her and on family.. so my dolly work was put on the shelf.

Unfortunately it did mean that I cancelled my stall at the Penrith Doll and Bear Show. My head and heart certainly wasn't in it and as I am still spending most days with my Mum in the hospital, I couldn't see how the logistics would even work.

But every cloud does have a silver lining, and although I wasn't able to place my work on an actual stall.. I was able to finally start restocking my Etsy Shop.

Slowly but surely my work is being uploaded.. but its a slow process, due in part to my internet speed and also with me still spending large parts of the day at the hospital.


I have a wide selection of knits that I have been hoarding for the show... this photo showing just a few of them, as well as a few dollies, bears, some hats, shoes, and a selection of dolly accessories.

I have also started to sell some of my vintage sewing collection, mainly laces, ribbons and buttons. I love being able to share my love of these and expand my collecting.... now I have an excuse to go hunting for them, because as it stands I have more than enough for any dolly or bear I would want to make.


This photo shows a very small selection of what I have. And each week I am adding more.... this week I managed to find some very special, very old mother of pearl buttons, about 1000 of them are going to be coming to join my big pot. My husband joked with me when I bought this big glass jar that I would never manage to fill it... hmmm,  I've never backed away from a challenge!


I've been sewing some of them onto gorgeous reproduction button cards.... you know I have never given any thought to button cards before and the skill it takes to stitch buttons on by hand, but I tell you after sitting for some time with needle and thread its not as easy as it seems... hehehe.


This little glass cabinet I thought would be perfect for my cotton reels. Though at the moment its filled with button cards and spools of lace. I have a real love for rummaging through second hand and antique shops looking for vintage cotton reels. When I  do manage to find them I am so excited... especially if they are a lovely pastel colour or even better, a very old one!


So yes I planned for almost two months that I would be at a doll show this weekend, but I woke this morning and walked out into my garden at peace with the fact that you never know the direction life takes you. I picked flowers for my Mum, and thought about new creations that I want to make and new ways to hunt for some ribbons and laces. And sure I am still very upset for my Mum and disappointed with the fact that I missed out being at the show, but its pretty hard to stay feeling sorry for yourself when you are walking around roses in full bloom.


Mel xxx

Monday 6 October 2014

Little Dolly Outfits

Well just a couple of weeks left to the doll show. Work has accelerated as I try to get as much completed as I can. This morning I laid out some of my items to get a feel for the stall.... I'm not sure if it helped or not, pretty sure it just made me more panicked. I have 6 dolls needing to be finished at varying degrees of completion. But at least some things are getting done, the mannequins now have dresses on them.


This little dress is made from Kent gingham and is finished with a lovely green silk satin ribbon and hand dyed vintage eyelet.

Hand dyeing the eyelet was my first attempt at dyes made from natural plants. I have fruit salad sage growing prolifically through my garden in winter, early spring I generally cut it down and put it in the compost when it starts going leggy, but I thought instead of composting all of it,  I would save some to make some dye from. The results were very soft, but I think it was a perfect soft sage green to go with this lovely green gingham.


Its definitely a fun experiment creating dyes from your garden. I put quite a fair bit of leaf into a big pot, filling it to the top, and boiled it down with about 1/2 cup of salt and some baking soda. The salt and soda act as a mordant and help fix the colour to the fabric.

 
This next dress is made from a beautiful piece of vintage fabric, a very soft lawn. The little apron is embroidered with matching rosebuds.... I think its a perfect little outfit for an old fashioned dolly.


The final outfit is an example of some of the more simple dresses and embroidered knits I will have for sale. Hopefully quite a selection will be available if all goes to plan. This little one I just loved, little daffodils and daisies!
 
Mel xx


Thursday 2 October 2014

Little Crochet Hat Pattern

I thought I would share a little hat that I am making for a doll show that I will be at in a few weeks. Its a very simple hat and a great project for a newby crocheter, or someone looking for a very quick and fun little project for your favourite little bear or doll. I generally make mine from crochet cotton, some of the cottons I use are authentically vintage, but I also use DMC Petra 5 which is widely available and has a lovely vintage colour range. You can play around with various cottons and yarns which will alter the size of your hat as well as its look. Just a quick note if you do decide to play around with different types of cottons and yarns, try to use a crochet hook that will provide you with fairly tight tension. The tighter it is, the firmer and more stable your hat will be.


For the hat pictured here I used a 1.75 mm crochet hook with DMC Petra 5. The size of the hat is small for a head circumference of approximately 7 to 8 inches. If you do decide to use a thicker or finer yarn it will, of course, change the sizing.  I finished the hat with some sweet antique lace and a vintage pansy flower, but the world is your oyster with how you would like to trim your hat, there are endless vintage laces, ribbons and braids available. You could make your own flowers as well, a few crochet flowers would look very sweet!

Ok, here's the pattern, if you have any questions or queries, just message me and I'll try as best I can to help. Also if you are very new to crocheting, YouTube is fantastic for teaching videos on crocheting and knitting, well worth referring to. This hat is made in the Amigurumi style crochet. It involves simple chaining, single crochet stitches and increases.

Abbreviations;

Sc = Single Crochet
Rnd = Round
* = Repeat
st = stitch
sl st = slip stitch

Pattern

Stage 1 is forming the crown of the hat, so you are making a flat circle.

Begin by chaining 2

Rnd 1 - 6 sc in first chain = 6
Rnd 2 - 2 sc  in each st = 12
Rnd 3 - (sc 1 st, 2 sc next st) * = 18
Rnd 4 - (sc 2 st's, 2 sc next st)* = 24
Rnd 5 - (sc 3 st's, 2 sc next st)* = 30
Rnd 6 - (sc 4 st's, 2 sc next st)* = 36
Rnd 7 - (sc 5 st's, 2 sc next st)* = 42
Rnd 8 - (sc 6 st's, 2 sc next st)* = 48
Rnd 9 - sc each st
Rnd 10 - (sc 7 st's, 2 sc next st)* = 54
Rnd 11 - sc each st
Rnd 12 - (sc 8 st's, 2 sc next st)* = 60

At this point you should have a circle with 60 stitches. Now we are going to make the side of the hat by simply doing single crochets in each stitch for 16 rows. Run a small piece of wool or cotton through your beginning stitch to act as a marker, this will help you count your rows so you don't get lost.

Rnd 13 to 28 - sc each st

Now work the brim, by adding an increase row and then following with some more single crochet rows.

Rnd 29 - (sc 1 st, 2 sc in next st)*
Rnd 30 to 33 - sc each st
Rnd 34 - sc each st, sl st last 2 stitches

Cut cotton, thread with darning needle, run it through the centre of last stitch, then run through some stitches on the inside of hat to secure the end.


Mel xxx